Sunday, January 27, 2013

TheSpiceHouse.com-A Review


About a month before we found out we would be moving to Colorado I ordered a pantry stock full of spices from The Spice House.

They are based in Chicago but ship all over. My package arrived in about a week and half, a little long for me but the shipping was free. Worth the wait!

I hate paying for shipping.

I use A LOT of spices... If this isn't the first post you've read from House of J than you've seen the little baggies in my ingredient shots...

This is a great way to buy spices. A. you save money on having the glass jars sent to you and B. Eco friendly.

I do have my own spice jars, But I haven't gotten around to labeling them just yet. With the move and all.

One amazing product that I ordered from The Spice House was the Madagascar Vanilla Powder. AMAZING.
It is so versatile, I put a pinch in my coffee every single morning and it has made my deserts so much more rich in vanilla than your basic alcohol based extract.

I also ordered. Oregano, garlic powder, onion powder, cilantro, cocoa powder, espresso powder, parsley, sage and Chai powder.

Chai Powder...AWESOME...I made these adorable little tea cookies using this and some scraped vanilla beans. DELICIOUS


Every spice that I've ordered I've used, loved, and enjoyed. The Spice House did not contact me for this review, all the opinions are my own, and unsolicited :)

xox,
House of J

Artisan Pizza Dough


I've posted a pizza recipe before but since then I've updated my recipe and thought I'd share it with you all.

I've ventured into the cheese making world and have had to find a lot of uses for the left over whey. Pizza dough is one of the best.

If you don't make cheese, you can actually buy whey. Water can also be substituted, but as a person who makes pizza dough on occasion I definitely noticed the difference. This dough recipe is very versatile. You can divide the dough and make two thin crust pizzas or follow my directions for a deep dish style crust.

Although neither the Giants or Broncos will be playing this year, the big game is next weekend and pizza is always a crowd pleaser.

You Need:
1 package instant dry yeast
1 teaspoon salt
2.5 cups all purpose flour plus extra for kneading
1 cup whey (or water)
1 teaspoon honey
2 tablespoons olive oil
sauce
cheese
Optional: Assorted spices and corn meal

I feel like all of my recipes start with "in a bowl" or "in a pot". Here is my go at being creative...

In your glass vessel, combine whey(or water) and yeast. Stir in honey.
While it activates start mixing the dry ingredients into another bowl of choice...

The yeast mixture should look cloudy and have little bubbles forming on top, pour this into your bowl of flour/salt.

Mix with a spatula until it all comes together into pasty clump
Then add in your olive oil, like so...
and knead with your hands...yes its sticky and messy...until it looks something like this.
Oil up a dish and set your dough to rest for about an hour, on top of your oven while it preheats to 450 degrees. Cover with moist cheese cloth or paper towel.

While your dough rises, you can get your other ingredients together, such as your sauce, cheeses and spices...
I always use a combination of mozzarella and parmesan but feel free to get creative here.

I did indeed make the sauce pictured from scratch, no I don't can my own sauces regularly. But when I have left overs I do store and freeze them for pizzas or quick dinners when I'm not in the mood to cook.
When your dough has doubled in size, flour your hands and knead your dough just until the stickiness goes away and the dough is easy to manipulate. At this point you can also take a pizza pan, or a stone and sprinkle with cornmeal. This gives the crust a really great texture.
I use a rolling pin...

Yes I am half Italian. But my name is not Luigi, I don't own a pizzeria so NO I do not know how to twirl dough...If you do...great. If not, here is how I got a pretty well shaped deep dish pie.

(at this point you could also separate the dough into two smaller pizza's for thin crust)

Put the dough right in the center of your pizza pan and start rolling toward the edges.
At this point you can use your thumbs and push the rest of the dough up and to the sides, thinning out that big middle and making a deep crust. Once the crust is formed, drizzle a bit of olive oil.
Use a pastry brush and spread the oil all around the dough and up the sides of the crust.
Here, I sprinkle some extra seasoning. I used parsley, oregano, rosemary and red pepper flakes.
One more shot of that, so gorgeous.
Pop the pizza dough in the 450 degree oven for 5 minutes to par- bake the crust. 7 minutes if you enjoy a well done slice.

Spread on your favorite sauce, we like A. Lot. Of. Sauce. Can you tell?
Then sprinkle on your cheese...Yep I made this cheese :)
I also sprinkled some parmesan and some more herbs.
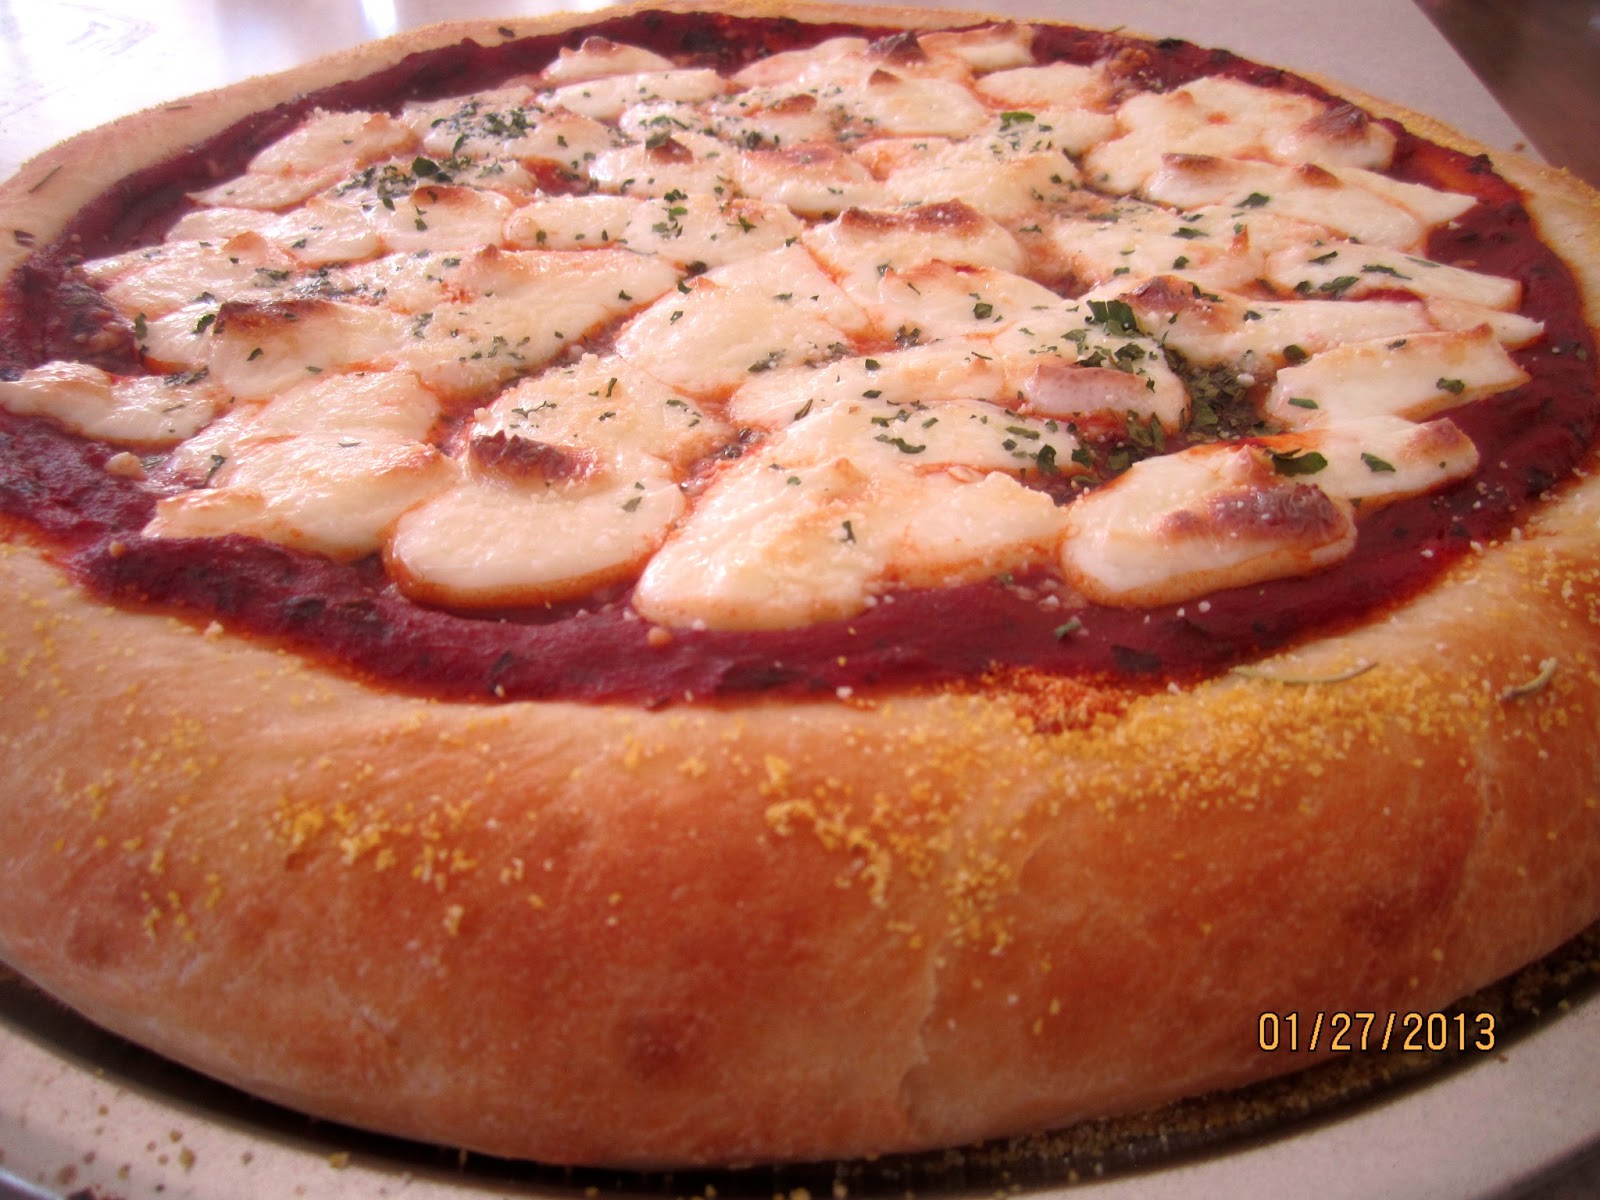
Bake for an additional 15-20 minutes depending on how you enjoy your pie. We like it well done.
Let it cool down for just a minute or so and slice and enjoy. Happy Sunday everyone!


Wednesday, January 23, 2013

Nursing...Trial & Error, Support and Cookies


Nursing is hard...If you think it is going to be a cake walk...YOU ARE CRAZY.

I have been nursing my 8 month old for 8 months minus 2 days...Before that, I nursed my 2.5 year old until she was 11 months.


Not because I wanted to stop. Because SHE wanted to stop...she was done. Very independent little girl and that was just the beginning.

My heart sank when I took my daughter to her first pediatrician appointment only to be told that she was starving and needed formula. I listened of course, but know better now.

I struggled...A LOT. I had production issues and 2 preemies. My youngest was in NICU and I couldn't feed him until the third day. I was very lucky that we were able to connect even though we missed those first critical hours when he was taken out of my arms and put in an incubator. It took a good few weeks months before we got a good nursing routine going and it stopped being so painful.

I was in some serious pain for a long while with the little fellow, bad latching, extra sensitivity, who can be sure the reasons. If it wasn't for EarthMamaAngelBaby...I'd probably given up.


I stuck with it for the second time around again, and I am so so glad I did...My little guy went from 1% to well over 30% in just a few short weeks and is practically walking at 8.5 months.. Both my children are so smart and I do give the mothers milk just a little of that credit...ok...A LOT of credit.

But I know it can be so challenging and production issues are mostly out of our control. Especially as new mommies who are consistently told to give in and give formula. I was lucky enough to stumble upon some cool sites and blogs listing the benefits and health factors of things like brewers yeast, oats and flax. I tried ever trick in the book, supplements and teas, they tasted so gross. But I was willing to do anything.

With my skills in the kitchen I knew I could create something delicious, healthy and great for nursing mommies.

Cookies of course...

I'm sharing this story with you as some inspiration to keep at it, and don't give up until your baby is ready. It's so worth it.


You can buy them Here. Or send me a letter for a donation to your cause( woman's shelters, veteran's and their wives, etc, through House of J's facebook page.


*(plug for earth mama angle baby is my own opinion and experiences I was not compensated or approached for this review)


Saturday, January 19, 2013

Roasted Garlic Parmesan Green Beans


I must've inherited the mushy vegetable tastebuds from my dad. Because he actually orders his vegetables "extra soggy". No Joke.

I'm not THAT bad, but I do enjoy a cooked veggie over a raw one...The problem with that though is they can go from to raw to mushy in a flash. So I present my new favorite way of preparing vegetables...

ROASTING

Anything can be roasted. It's easy, its relatively fast and they stay crispy and crunchy while still being cooked just enough.

After rinsing and draining your fresh green beans, and cutting up some garlic, it really takes no effort at all.

You need:

fresh, cleaned and trimmed green beans
sea salt
olive oil
1 garlic clove, chopped
grated parmesano reggiano
oven safe tray or cookie sheet

Preheat oven to 400

Spread out your green beans on your baking dish so that they are not over lapping but still close together.

Toss your garlic around and generously pour olive oil over your green beans and garlic, a good 1/4 cup at least.

Sprinkle sea salt and cheese to your liking. I liked a gentle sprinkle of each but feel free to be more generous.

Pop in the oven and bake for 15 minutes or until green beans have slightly browned tips and cheese has bubbled.

Serve and Enjoy :)


Simple Salted Caramel Popcorn


Happy national popcorn day!

We all love popcorn. It's buttery, salty, savory and delicious...We still love sweetening and spicing it up. I remember getting those tubs of cheesey popcorn or caramel corn for almost every holiday.

One of the problems with caramel corn is that often times it comes in a gigantic portion that you never finish before it goes stale. The other issue is that it is laden with chemical preservatives.

This recipe is way easy and you don't need a popcorn maker to do it, just your regular microwave popcorn pack and some average pantry ingredients...

Simple Salted  Caramel Corn

You need:
1 package microwave popcorn, cooked (you are welcome to use fresh popcorn also, about 3 cups)
5 tablespoons butter
1 and 1/3 cup brown sugar
3.5 tablespoons corn syrup
1 teaspoon sea salt
Pinch of baking soda


Melt your butter in a small sauce pan over medium-low heat. Add in brown sugar, corn syrup and salt   And whisk constantly. The mixture will thin out and become saucey in about 3-5 minutes on medium-low heat.

Make sure your popcorn is spread out on a cookie sheet and your oven is preheated to 200

Keep stirring until it starts to lightly bubble up, add in that pinch of baking soda and remove from heat. Quickly pour over your popcorn and gently fold until covered.


Keep your caramel corn in the oven for about 1 hour, folding the popcorn intermittently to coat all pieces evenly.

Take out your caramel corn and enjoy it warm and gooey, or spread out over parchment paper to dry.

Either way its delish:)


Sunday, January 13, 2013

Coconut Creme Angel Food Cake


Sometimes it is nice just to be able to indulge a little in the comfort of your own home, when the munchkins are asleep...

I call these, home date-nights. Relaxing, quiet (for the most part) and a bit of something yummy for dessert. Angel food cake is the perfect dessert when you want something sweet and creamy without all the calories.

There is no butter or egg yolk in the recipe and the sugar is so minimal. It's almost the cake version of a meringue or French macaron. I went a little more intense with a home made whipped cream and a sprinkle of toasted coconut, this is completely optional.

The coconut creme almost gives it a cheesecake-like texture.

You need:
(serves 10)
  • 1 and 1/4 cups turbinado sugar or sugar in the raw
  • 1 cup cake flour
  • 1 1/4 cups egg whites
  • 1/2 teaspoon salt
  • 1 1/2 teaspoons cream of tartar
  • 1 teaspoon pure vanilla powder
  • 2 tablespoons finely shredded coconut
  • 1 tablespoon coconut milk
In a large bowl combine flour, 1 cup sugar, vanilla powder and shredded coconut and set aside.

In the bowl of your electric mixer combine egg whites and cream of tartar. Mix on medium high speed for 3-5 minutes or until egg whites come to soft peaks...

For beginner bakers, this process is a touch complicated because the term "soft" is relative, here are some photos of the process.

These whites have been whipped for about 1-2 minutes and are considered "foamy"

After about 3-5 minutes your eggs will become like pillowy clouds, where the whisk falls right in but its still pretty solid
at this point you can add in the remaining 1/4 cup of sugar and whip high speed for another minute or so until stiff peaks form, when you lift the whisk, the egg white should stand straight up and have a glossy shimmer.
This is where you can start folding in your flour mixture slowly to incorporate. Pour into a lightly oiled spring form pan.
Shake the pan a bit and bang it on the counter a few times to let all the air pockets out and to smooth and flatten.
Bake at 350 for 35-38 minutes until golden in color and springy to the touch in the center of the cake
Set aside to cool. 


In the mean time, here is a quick, painless and all natural way to make delicious whipped cream.

1/2 cup heavy whipping cream
1 tablespoon sugar
1 teaspoon vanilla powder 

Run a little cold water in the bowl of the electric mixture and pat dry with a paper towel.
Combine sugar and whipping cream and mix on high speed for about 5 minutes.

For the last minute, add in your vanilla. If you'd like to coat the entire cake, just double the recipe.
I also put some extra coconut flakes in a pan and sprinkled with just a pinch of sugar. In a 400 degree oven it only took 2 minutes to get them this beautiful toasted brown color. Great for a little garnish.

YUM


Saturday, January 12, 2013

Flavorful French Onion Soup


A few months ago I posted about how to make a French dip from real French onion soup, not a canned version or a powdery chemically enhanced mix.

I originally used the pioneer woman's recipe ( love her ) but we decided that there were a few changes and revamps that would better suite our taste buds.  

With a snowy wintery day and two napping kids, I spent the whole day "slaving" away in the kitchen...but it was well worth it ;)


You need...

2 very large Vidalia onions
1 clove of garlic minced
6 cups beef broth
1 cup chicken broth
1 tablespoon worchestershire
Lots of pepper and a pinch of salt
3 tablespoons butter
I am sure everyone knows how to chop an onion, but there is a simple method to getting those long stringy strands just like a restaurant.
Start by cutting the the long end of the onion off and peeling back the skin and first layer.  Then cut in half, keeping the root attached and intact.
Follow the natural grain lines of the onion and slice from the base of the root down in small slivers. 
When the onion is sliced, cut the root off  and there you have it, nice long strands of onion, perfect for French onion soup. 
Melt the butter in a heavy bottom pot and throw in your onion strands, season liberally with salt and pepper. Cook covered on medium heat for 30 minutes. The onions should be soft and translucent at this point.

In a 400 degree oven, slide your pot in and cook another 30 minutes, stirring occasionally. Cook one last time in the oven, for 5 minutes uncovered to let the onions brown up jus a bit.


Return to the stove top and pour in your stocks, minced garlic and Worcestershire and let simmer on medium-low heat for 45 minutes to a an hour.


While the soup is simmering you could either bake a nice rustic baguette or cut up a store bought loaf and toast until crispy and almost burnt. The soup softens it so much that the crispier it is the more depth of flavor it absorbs from the soup. You also need a few slices of gruyere cheese. Although a little more pricey than lets say, cheddar, its one of the best cheeses in my opinion.

I also prepared a deliciously light and airy coconut creme angelfood cake for dessert, recipe soon to come.

When the soup is finished, pour some in an oven safe bowl with a slice of bread and finish off with your cheese.

place in the oven on "broil" for 3 minutes, or until the cheese is browned slightly and bubbling to perfection.

Perfect for a cold wintery night. Enjoy :)