Sunday, March 31, 2013

Lightened Up Wholesome Home style Biscuits

I don't like vegetables enough to eat 100% raw...BUT my family and I are working hard to eat mostly organic, all natural and less produced foods. I don't think I'll ever be able to tell the hubby to never eat another slice of deli meat or a Hebrew National Hotdog, but I can at least minimize those chemicals by serving home made staples with pure ingredients...

We found a great local honey company at our local Costco...And although it doesn't sound very pure & organic, Costco out here is very good about having local items and organic ones as well.

A great biscuit can really make a meal that much more special. But those frozen ones are just PACKED with chemical additives like...

Hydrogenated soybean oil
Sodium aluminum phosphate
Xanthan gum
and of course the ever popular
"natural & artificial flavors"

It was so easy to make these, and although esthetically they aren't as delicious looking as the ones in those little cardboard tins...

They are raw healthier and if you buy the right ingredients, are GMO free!
You need:
Organic/GMO free certified
1/2 cup whole wheat flour
1/2 cup white flour
1 tsp + 1/4 tsp baking powder
1/4 tsp baking soda
1 tblsp honey
1/2 cup milk
1 tblsp vinegar

add in vinegar to the 1/2 cup of milk and let sit for 3 minutes. (you can buy buttermilk, but why bother)

In the bowl of your electric mixer put in all the dry ingredients and mix on the lowest setting to incorporate.

add in your honey to the milk and vinegar mixture and then slowly pour into the dry ingredients
take 5 tablespoons butter cut into small cubes (I cut each tablespoon into 4's)

gently fold the butter into your mixture with a spatula.
take some parchment paper and flour heavily. add your dough and then flour some more. I use white flour for this part because wheat can be a touch sticky but you can use either.

roll your dough about 1/2 inch thick and then fold over, roll out again and fold one more time in the opposite direction.

use a small round fondant cutter or biscuit cutter...even the rim of a glass.

place on a nonstick baking sheet or line with parchment and bake for 10 minutes at 400 degrees

This recipe made 15 miniature biscuits but should make 7 or 8 regular sized ones.

enjoy:)


Wednesday, March 27, 2013

Planning for Birthday Bash 2013


What started out as a little recipe blog became an everything under the sun kind of blog.

I promise to update our recipe index soon, but there is SO MUCH going on over here at the House Of J that time is just whizzing by.

I cannot believe how fast this year has gone by. My little girl is going to be 3 and my baby boy is approaching his 1st birthday. We've moved across country, started a business and have watched our little ones grow and change every day...

In only 2 short months House Of J will have a HUGE Double Party Feature~!!!

Can you guess the theme?

TOY STORY!

So far we've got a bunch of great vendors signed up and I will be featuring them this week! AND of course in celebration of this amazing extravaganza, Your's truly will be giving away 1 dozen Toy Story themed treats--- But you have to check out all our featured vendors this week to collect the "secret word"

This past week the fun filled boxes of joy started coming in! And Julia couldn't been more excited!

I met a wonderful lady named Christine, Her Etsy store CSCUTECRAFTS(secret word) is packed with fun party decor in lots of themes. Can you picture the excitement when these showed up in the mail?


They are made so well, well enough to withstand an almost 3 year old and a 10 month old playing with them until nap time (so I could hide them haha). The features are on point and I couldn't be more excited to display them at the kids upcoming event. Wait until you see what neat ideas I have in store for these little guys!

Our Big Birthday Bash Feature will be in Early June, but until then, Check out Christine's shop & tell her House of J sent you!

xo


Thursday, March 14, 2013

House of J Feature & Giveaway!


I'm not Irish...

But I love a good brew and a fun parade (who doesn't) So how about a St Patty's day giveaway!

One Of my new besties is also a blogging momma! Her site is chock full of giveaways on a weekly basis and has graciously featured the  House of J Etsy store and local chapter!

In celebration of her adorable little munchkins 1st Birthday, House of  J is supplying cute little cupcake toppers to go along with their "Luck of the Irish" themed Birthday Bash!!!

Check Out Dani Sue's Review of my local "Lactation Cookie tasting party" from last week HERE.

And Don't forget to enter the giveaway extravaganza going on at her page this week for a chance to win a basket full of goodies from yours truly! (Details below!)


Wednesday, March 13, 2013

House Of J- Local Chapter!


I just wanted to give a quick thank you to all of my readers, fellow blogging mommies and friends out there. February was "House Of J's" Most Viewed and most talked about month since the beginning!

 I never imagined a little recipe and party blog would turn into a REAL BUSINESS! We have so much planned for the coming months with a ton of giveaways, features and some really amazing partners and vendors.

 The munchkins are having their first combined birthday this year and we have so many exciting partnerships to share with you all! I just wanted to take a minute and tell you all about our new adventures.

 House Of J will become a .COM by months end--> our blogger account is open and will be featured for now but please keep a look out for our new URL!

 We are going to be super involved in our local community with farmers markets & we will be at the Great Cloth Diaper Change of Norther Colorado. Its going to be a great year and I am excited to share the ride with lots of other local Northern Colorado mommy owned businesses and my readers!

House of J is now on twitter! Follow us @ HouseofJFC

I hope you all entered the Tropical Traditions giveaway because it is ending soon and I'd love for everyone to have a chance at winning a really great baking ingredient. I hope you send me a photo of what you created with it!

 House of J is also participating in a great giveaway that is hosted over at http://danisuedreams.blogspot.com/ That starts Tomorrow!

 with Love , House of J

Thursday, March 7, 2013

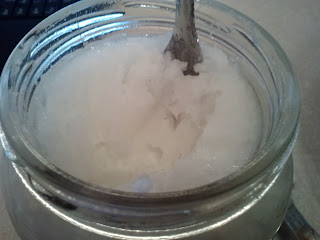
Tropical Traditions Review & Giveaway!

Gold Label Virgin Coconut Oil - 32 oz.


House of J is featuring its first hosted giveaway for our wonderful Facebook Fans! Thank you to our sponsor TROPICAL TRADITIONS!


I know you guys are amazing bakers if you are reading my blog. :)

So you will appreciate this really delicious and healthy alternative and  its also GMO free which is a really huge concern for us here at House of J.Coconut oil has so many uses but my favorite way to use it is in delectable desserts.

I am new to all the wonders of coconut oil personally but I've made some really amazing treats.. Like the Dairy free vanilla cupcakes I've shared with you all. HERE.

Not all coconut oil is created equally and it does come with a hefty price tag but it is well worth it. Especially for my vegan and gluten free friends. The pure Virgin Coconut Oil is the way to go if you'd like a fun alternative to using butter or canola oil in your recipes.


Tropical Traditions is gifting one lucky House of J fan a jar to try! I am so excited to see what ideas you can come up with using coconut oil!

Wednesday, March 6, 2013

Sundried Tomato, Roasted Asparagus and Parmesean Risotto


One thing I will always miss about NYC is food.

I can cook any dish you would order at a fancy Italian bistro in Manhattan but there are somethings you enjoy eating out.

Risotto is one of them. 

Also, imported cold cuts and fresh mozzarella (not from a super market).

This dish will impress hubby, or any guest and is something special for my vegetarian friends.

Risotto can be a little finicky and does take a little time, But if I can do it while entertaining a toddler and a baby at my feet, than so can you.
 
You Need:
1/4 of an onion, chopped
3/4 cup arborio rice
3 cups chicken broth
2 cloves of garlic
10 or so strands of asparagus
sun dried tomatoes(in oil)
Olive oil for drizzling
1.5 tablespoon butter
1/4 teaspoon red pepper flakes
1/2 teaspoon dried basil
salt and pepper to taste

Because risotto requires a watchful eye. I recommend following my steps exactly so that you aren't distracted by the other things going on in the kitchen. If you are serving this as a main dish GREAT! But if your hubby requires a meat at every meal like mine does, make your main course ahead of time and just put it in the "keep warm" option of your oven while you work on your Risotto.

Clean and trim your asparagus(about 1.5 inches off the bottom) Lay it out on a baking dish with your 2 cloves of garlic, still in their skins.
Drizzle Olive oil over both and sprinkle with some sea salt. Bake at 400 for 20 minutes

Cut up 3 or 4 of your sundried tomatos, and reserve 1/4 cup finely grated Parmesean. Set aside.
While your garlic and asparagus is roasting, start chopping your onion and melt your butter. Brown the onions for 2-3 minutes until they start to soften.

In the meantime take 3 cups of chicken broth and bring to a slow simmer in another pot on the stove.
Soften your rice just a little bit by pouring the uncooked rice into the pan with the onions and butter for just a few moments until the rice absorbs all of the left over butter.  
On medium heat, start to cook your risotto by adding in your simmering broth a few spoon fulls at a time until the rice absorbs it. Stirring continuously. This takes about 25 minutes.
When there is 1/4 cup of broth left in your pot, add in your parmesean, chopped sundried, red pepper flakes and basil to your rice.

Lower the heat and pour in the remaining broth.
Take your roasting veggies and chop the asparagus into thirds. Carefully squeeze the soft roasted garlic out of its shell and into your risotto.
Add the asparagus, sprinkle some salt and pepper to taste. Fluff with a fork and serve immediately.

YUM!

Sunday, March 3, 2013

Very Vanilla Iced Chai Latte


There is this little hole in the wall doughnut shop on the East Side in Manhattan called "Doughnut Plant". My friend and I used to walk all the way from the West Side, through crowded China town just for their iced chai's. You can't even sit and enjoy a doughnut and a drink in there without people knocking into you or giving you dirty stares that you are taking too long. Oh the joys of city living.

It was one of the stops that I tried to make one last time before leaving for the "country" sadly, no iced chai's that day (sad face)

One thing about coffee and lattes of any kind is how much "dough" you are forking over for one! I am still shocked when I order a coffee and a kids chocolate milk and its $10.00

Iced Chai's are so fun and easy to make at home. I've used so many recipes to blend my own but Oregon Chai concentrate is by far my favorite. It isn't too spicy and its just perfectly smooth. Even though it is sold back east, It took moving to Colorado to find out about it...YUM

In my new found eco-friendly fondness I also have a cute reusable coffee cup that I am in love with. It's 24oz so it does make one giant cup of chai(I got it on clearance!!) 

Here is a fun, fast and delicious recipe.

You Need: Makes 24oz
3/4 cup Oregon Chai Concentrate
Ice
1/4 cup vanilla soy milk
1/2 cup 2% milk
1 teaspoon madagascar vanilla bean powder ( a little pricey but it will last a long while, available at wholefoods in the baking isle)


Fill your cup half way with ice and pour in the chai concentrate. 
Measure out your milks and combine. Add in the vanilla powder, stiring until the powder has broken down and all you see is the tiny little black specks. Those are the vanilla beans :)
Add the milks & vanilla mixture to your cup, stir and enjoy :)


Friday, March 1, 2013

Dairy Free Vanilla Frosted Cupcakes


Since starting my Etsy business, I've had various requests for different types of allergy adjustments which of course gets me into the kitchen working with fun new ingredients and different flavor combinations...

I can't say this recipe is 100% dairy free because there is 1 egg in the batter... Some people consider eggs dairy while others do not. And since no one in my family has allergies to anything food related, I've never had to worry about it. This can be substituted very easily with 1/2 ripe banana.

Tomorrow is Dr. Seuss' birthday..So I decided to have a little fun, try some new ingredients and make a cute little treat. Feel free to just bake the cupcakes without the food coloring because they are just as delicious, I promise.

Dairy Free Vanilla Cupcakes: 
(this recipe makes 6, double if making a full tray)
Side note: Eco Friendly recycled cupcake liners, cheap and sustainable :)


1/4 cup Spectrum Organic shortening
1/3 cup granulated sugar
1 large egg
1 tablespoon vanilla extract
3/4 cup all purpose flour
3/4 teaspoon baking powder
1/4 cup vanilla soy milk

In the bowl of your mixer cream together shortening and sugar. It will look pretty grainy at first, but will become smooth and shiny in about 4 minutes on medium speed.

In a seperate bowl combine flor and baking powder and set aside.Add in 1 egg and vanilla in your sugar/shortening mixture and mix until smooth and creamy. About 2 minutes more.

Slowly add in the flour mixture and soy milk in 3 parts, alternating until smooth. Mix another minute.

If you are coloring your batter, separate into different bowls and add a drop of your favorite colors, I used gel color, a little bit goes a long way.

Drop in teaspoon fulls of the different colors in the lined cupcake tin (3/4 full) and bake at 350 for 18 minutes.

Cool on a wire rack for 20 minutes or so. 

While they cool down, work on the frosting..

Vanilla Coconut diary free frosting using Tropical Traditions Virgin Coconut Oil.
adapted from

You need:
2 tablespoons Virgin Coconut Oil
6oz icing sugar
2-3 tablespoons soy milk
1 teaspoon vanilla extract

*side note*(last one I promise)
I DID NOT MISS BUTTER AT ALL! this "frosting" recipe is so delicious.While the texture and ability to decorate with it is a bit limited, It is really a fabulous topping to any confection.

The oil is solid so it takes a bit of work getting it integrated into a smooth icing but its worth the work.
Add in the coconut oil and vanilla and mix on medium speed until the coconut oil breaks apart and starts looking a bit more creamy. Add in icing sugar and mix on low speed, pouring in your milk until you get a glossy, creamy icing.

Now the texture is a bit runny, but IMO adding more sugar would make it much to sweet. The texture was more of a glaze but a few minutes in the fridge hardens it up a bit and makes it much easier to work with. The slightly sweet coconut flavor on the vanilla cupcakes was just a marvelous combination.

Sprinkle a few sprinkles and enjoy :)


Chicken with String Beans


The hubs and I LOVE Chinese food...

I am so sorry to say this but, there is no good Chinese food out here. It's weirdly mild when everything else has a kick. Its not cheap either, back in our home town, you could get a combination plate for $8.00 and call it a day. Here, Chinese takeout is like $40.00

CRAZY 

If anyone local can point me in the direction of REAL Chinese food, I'd love you forever.

In the mean time...I'll cook it :)

I haven't mastered our favorite dish yet,"cold sesame noodles" but I hope to accomplish that one soon.
For now here is a homemade twist on a favorite of ours...

Its very simple but what really makes it is the sesame oil and it would've been even better if I'd had rice vinegar on hand.

Sorry for the photo, of course I missed 3 ingredients...Water, chicken broth and corn starch.
This dish cannot get any more simple.
For the marinade You Need:
2 Boneless chicken breasts, trimmed and cleaned
Green beans, or French Beans
2 cloves garlic, minced
1/2 cup soy sauce
3 tablespoons sesame oil
1 tablespoon vinegar
drop or 2 of red chili oil(OK we used about 5 or 6 drops)
Salt and Pepper to taste
Let your chicken soak up all of this delicious flavor for as long as possible, over night in the fridge or a few ours on the counter, even 20 minutes if you are in a rush.

When you are ready to cook add in 1/2 cup of chicken broth and 1/4 cup water and saute on low heat until chicken has browned.

I served this with rice, and the timing was absolutely perfect, boil your water and begin your rice while the chicken cooks, when you are ready to simmer your rice, throw in the string beans and turn the heat up to medium-low
Add in 1 tablespoon cornstarch and whisk in until smoothed. The sauce will thicken very quickly so keep whisking, add in tablespoon or two of water if it starts getting too thick..

18 minutes later your rice AND your chicken with string beans are complete :)

Takeout food, at home :) How healthy is that?